This section explains
the basic functions of I-Tex. If you follow the simple steps
described here, you will have created your first texture by the
time you finish reading this page!
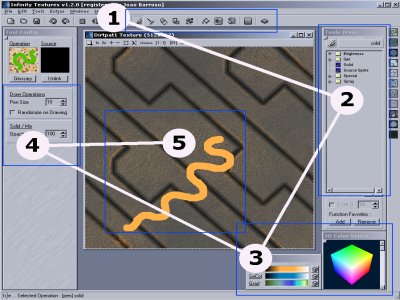
This is I-Tex's interface. To work with a texture
you have to take the following steps :
(1) The functions of I-Tex are structured
in categories like lines or ellipses. Choose the category here.
(2) For every category there are several
functions listed in a tree view. Choose the function that you like to use
here.
(3) Colors can be selected on the OpenGL-Cube
or in the Color Window.
(4) The Tool Config Window is used to adjust
the selected function like the opacity of a pen.
(5) Now you can use the selected
function on the texture. Pen-, line-, ellipse-, sprite- and rectangle functions
require that you define the figure you want to apply. Functions like fill
or utilities only require a single click with your mouse.
These steps are now explained more detailed
:
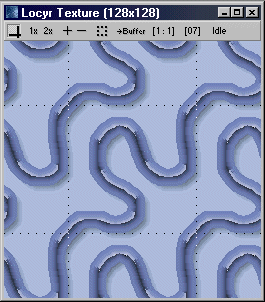 |
First, create a new texture by selecting
file
\ new texture. A size of 128x128 pixels should be enough for the first
steps.
A new texture window opens with the secondary
color as the background color. It will be tiled at 2x2 if not too big.
That's a great advantage while creating textures because you instantly
see your texture tiled, and it's a lot of easier to get a seamless pattern
by drawing on a tiled surface. The grid lines on the texture form can be
switched on and off, and the texture can also be zoomed. |

(1)
On this toolbar you can select an operation category. This is a group of
functions having similar characteristics. Now click on the pen button
to use the functions this category contains.
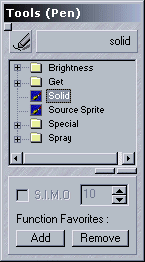 |
(2)
This window contains all the functions within the selected category, structured
in a tree view. Here you see the freehand pen function group. As
an example, if you were to use the selected function shown here, solid,
you could click on the texture and draw something. |
 |
Using these two windows you can select a primary
and a secondary color. Most functions will only use the primary color,
but some special functions like edge trace \ light use the secondary
color for the light source. You can select the primary color by clicking
on the color gradient at PriCol. The button to the right of the
gradient will create a random color. To select the secondary color you
perform a similar procedure with the SeCol gradient.
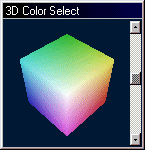
(3)
3D Color Select uses OpenGL to place a
color cube at your disposal. Use the left mouse button to rotate the cube,
and the right button to zoom in or out. Just click without moving to select
a color. Clicking the left button selects the primary color, and the right
button the secondary color. The scroll bar on the right adjusts the color
saturation on the cube. |
 |
(4)
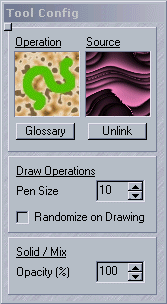
In the tool config window you can configure each of I-Tex's functions.
At the top of the window there is a small images showing an example of
the operation. Here you have selected the
solid function of freehand
pen, and you can now adjust how the function should work if desired.
You will be asked whether these adjustments should
be saved when you exit I-Tex.
Note: Every function of I-Tex is
explained in the glossary. Click on the button below the example image
to get further information about the selected function. |
Let's go:
 |
Click on the pen button on the tool bar, then
select the solid function in the tree view. Draw your pattern on
the texture using the solid pen. |
 |
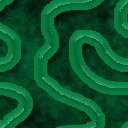
Now press the fill and filter button at
the tool bar and choose plasma \ color replace. For this example,
choose a green similar to the one seen here. Now click on the textures
background to replace it with a green plasma. |
 |
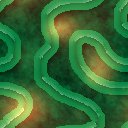
Now by choosing edge trace \ shadow and
clicking on the previous pattern once (or even better, several times) you
can make the pattern drop a shadow on the texture. After this choose
edge
trace \ light and use it with an edge mode of 3. |
 |
To make the texture more interesting you can
now select the ellipses category and choose special \ gentle
blend. Make sure you have an orange primary color (looks better on
green). Now draw some ellipses in 3 or 4 different places to get an effect
of glowing spots. |
Congratulations. This was your first texture
in a series of hopefully plenty.
|